
You may use this tutorial for personal use only. Please do not distribute in groups, post on a website or send via
Email without permission by me. This tutorial is copyrighted by me. Please do not share without permission.
Debi Jarrell
To do this lesson, you need Paint Shop Pro - any version, although this is done in version 8. You can get it here.
You need the bird and blue-power-mass tubes (zip included). You also need Simple filter which is available here and is free.
- Step 1
- Open a new 400x400
- Step 2
- Flood fill with a light color
- Step 3
- Open blue-power-mass, edit>copy, Edit>paste as new layer on your working canvas. Minimize original.
- Step 4
- Effects> Plugins>Simple>4 way average
- Step 5
- Effects> Plugins>Simple>pizza slice mirror
- Step 6
- Effects> Plugins>Simple>center tile
- Step7
- Maximize blue power mass edit>copy paste as new layer on your working Canvas.
- Step 8
- Adjust>color balance>manual color correction and use the following settings.

R: 0 G: 0 B: 192 Source #668EFF Target #C0C0C0
- Step 9
- Open bird, edit>copy, edit>paste as a new layer, close original. (Image needs to be resized)
- Step 10
- Effects> 3d effects> drop shadow Use these settings:
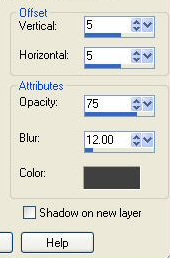
Vertical: 5 Horizontal: 5 Opacity: 75 blur 12
- Step 11
- Layers>merge>layrts>merge>merge all>Flatten
- Step 12
- Image>add borders, use the following settings:

(I used #FBFF6F)
- Step 13
- Click on the yellow border with your magic wand.
- Step 14
- Effects>3d effects> inner bevel and use the following settings:
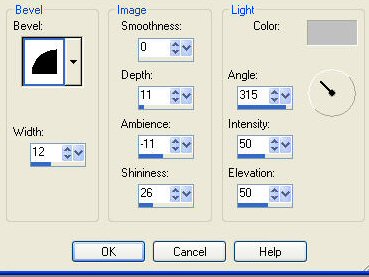
Selections>select none
If you wish to put words or a name, put it on now, and use the same Drop shadow as in step 10.
Add new raster layer, apply your watermark on the work, merge>merge all>Flatten And you're done!
I hope that you enjoyed this tutorial. If you have any questions you can email me here.
Copyright © 2008 Debi Jarrell
All Rights Reserved